How To Install the Caleffi XF Magnetic Filter
Stephen Elsmore, Senior Technical Support at Altecnic, runs through how to install the NEW Caleffi XF magnetic filter.
The removal of dirt and air from a system is important to ensure that the system remains efficient. Through the installation of dirt and air filters the lifespan of a system can be increased, but ongoing maintenance must happen for this to possible.
The NEW Caleffi XF dirt and air filter comes with a self-cleaning function, which minimises downtime and makes maintenance easy and ensures the system is kept running. Find out how the Caleffi XF can be installed and maintained by reading the guide below.
Step 1:
Choose the location of where to fit the Caleffi XF filter.
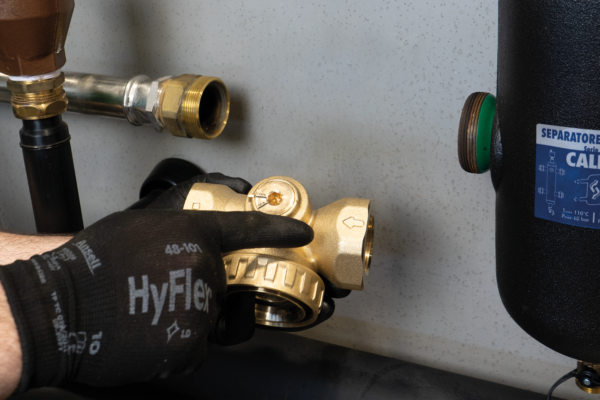
Step 2:
Install appropriate adaptors to suit pipework connections and ensure the correct tightness for the prevention of leaks.
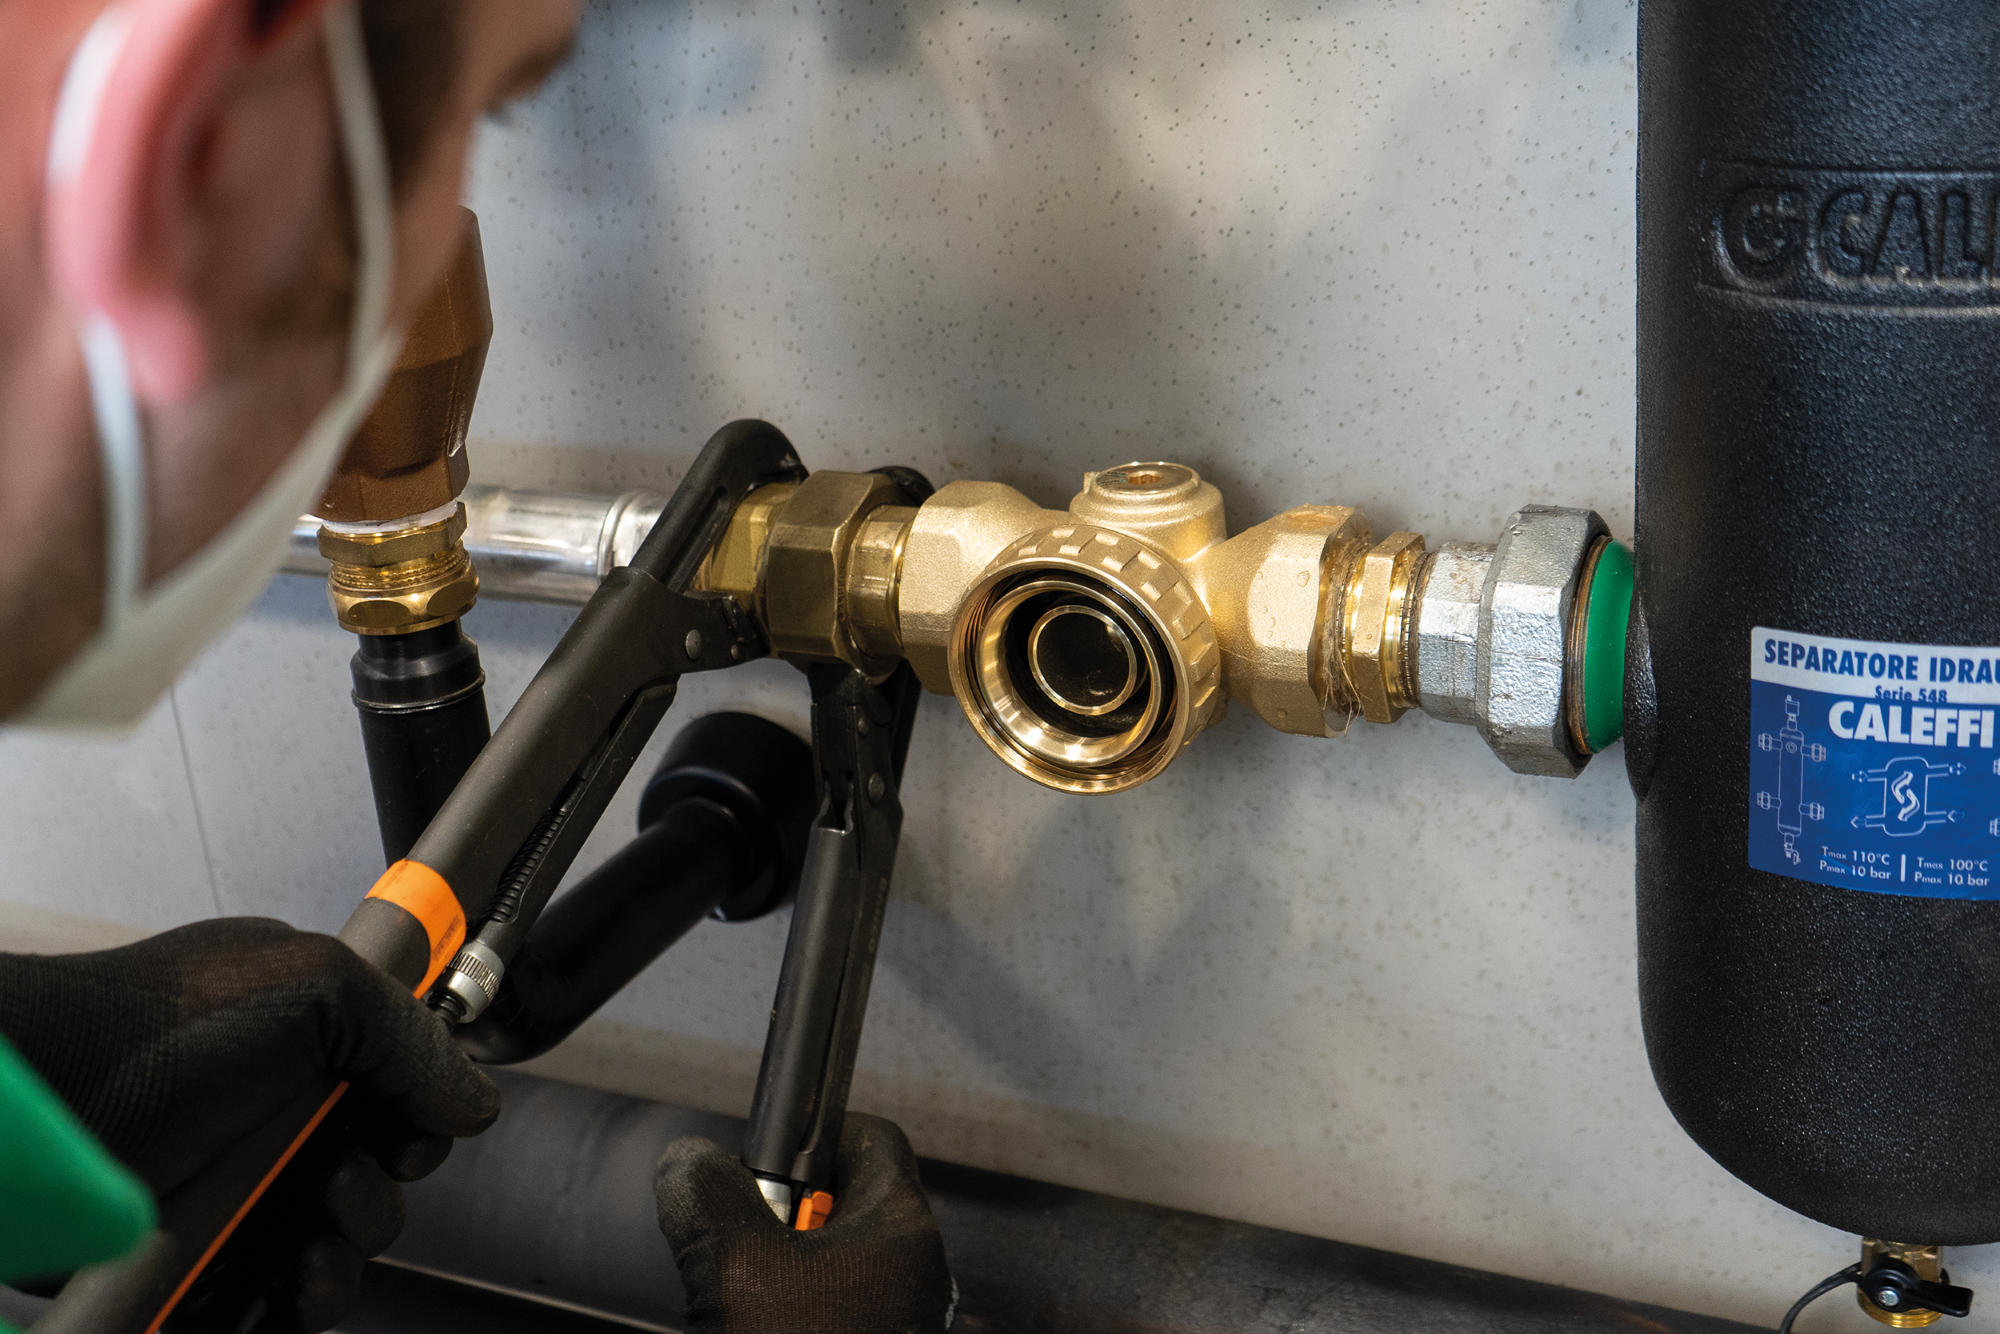
Step 3:
Once pipe connections are made, install the body of the filter in the correct orientation and flow direction.
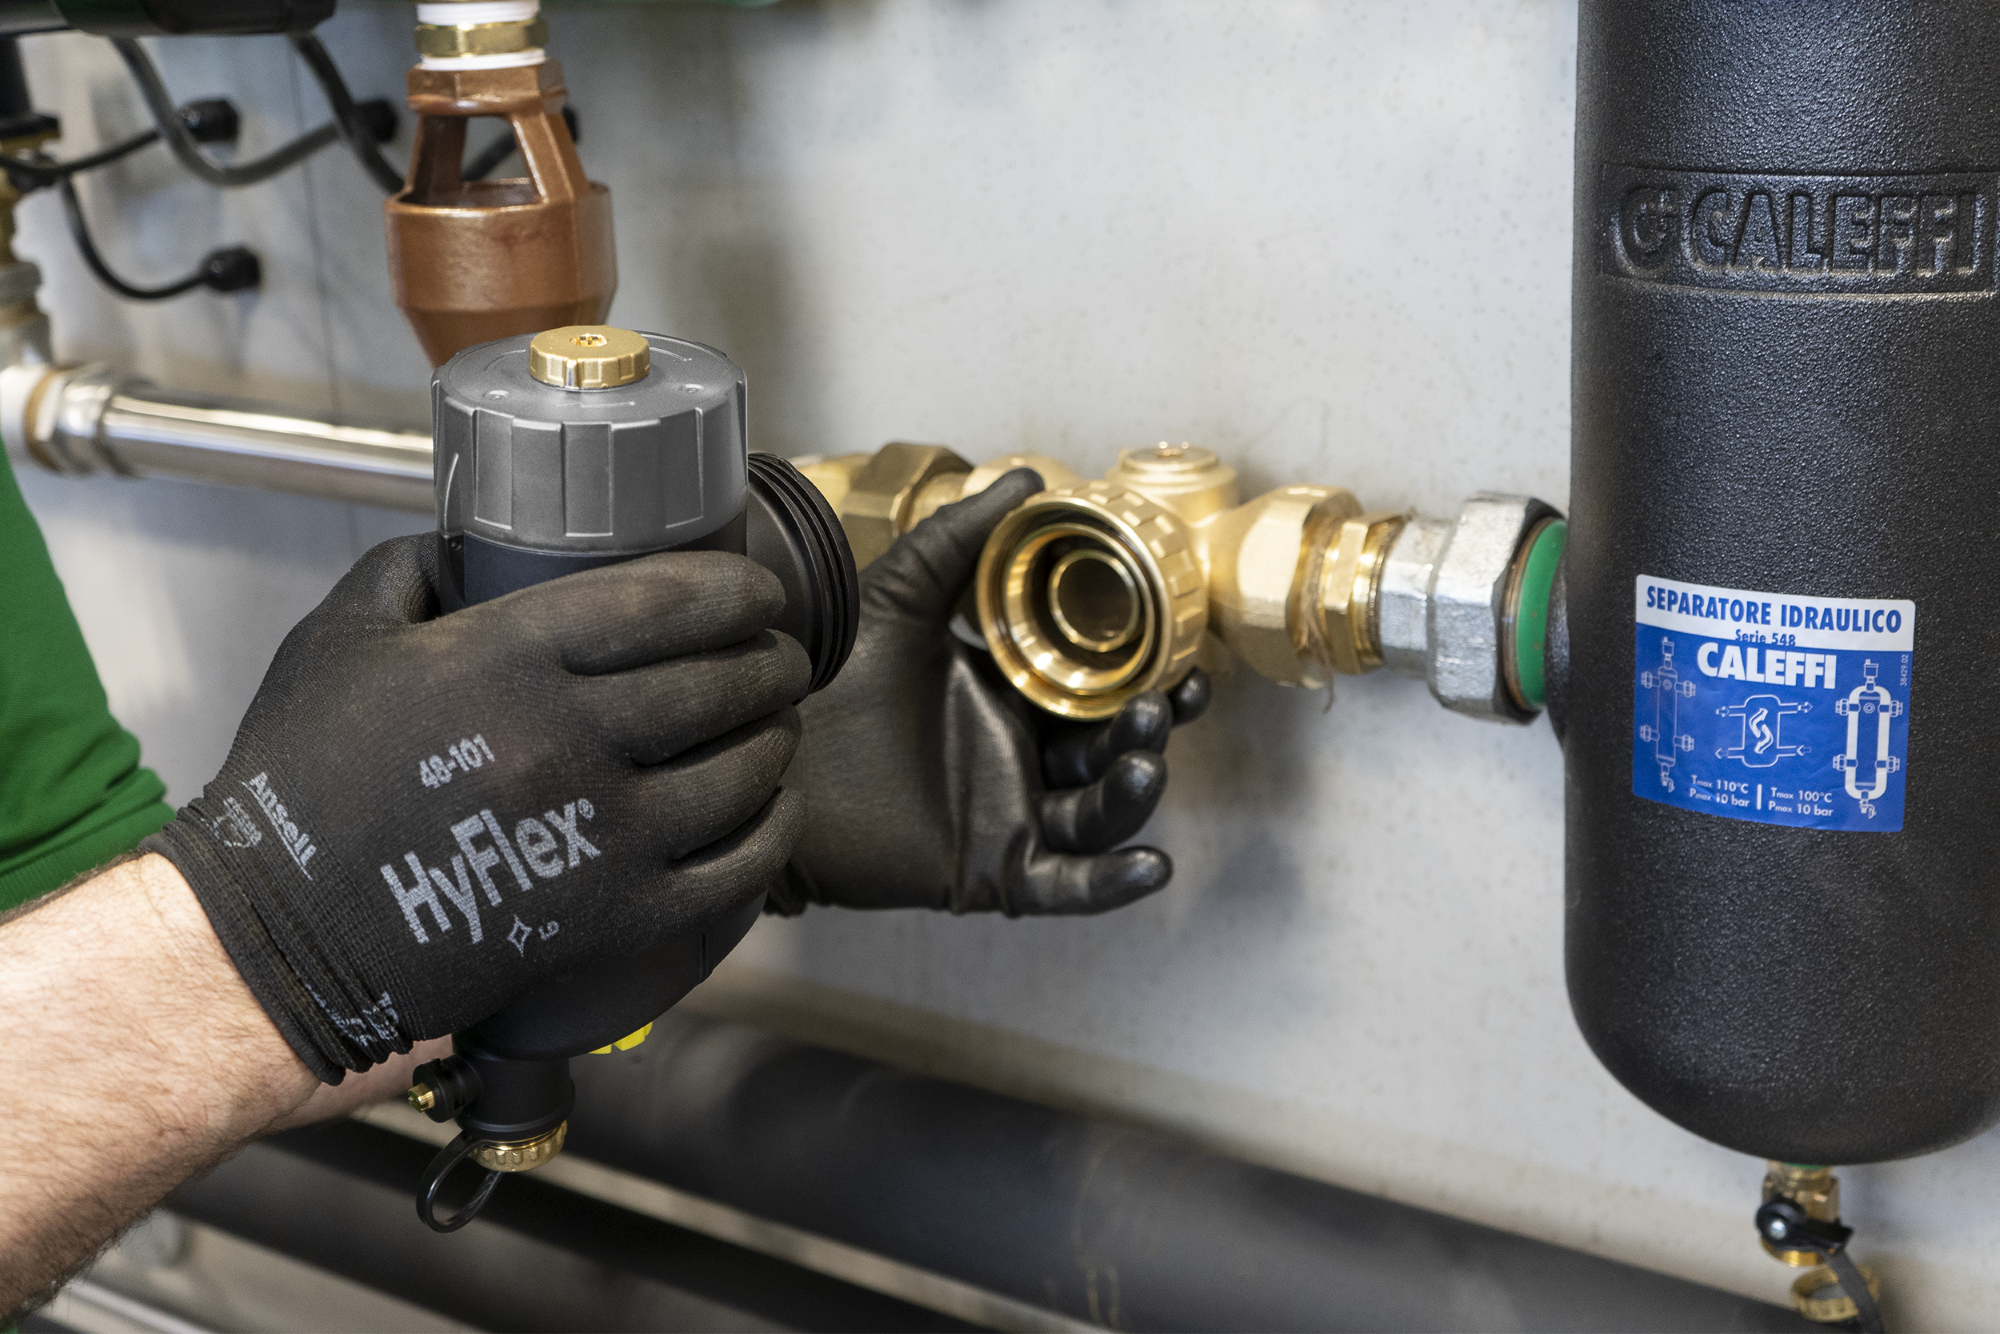
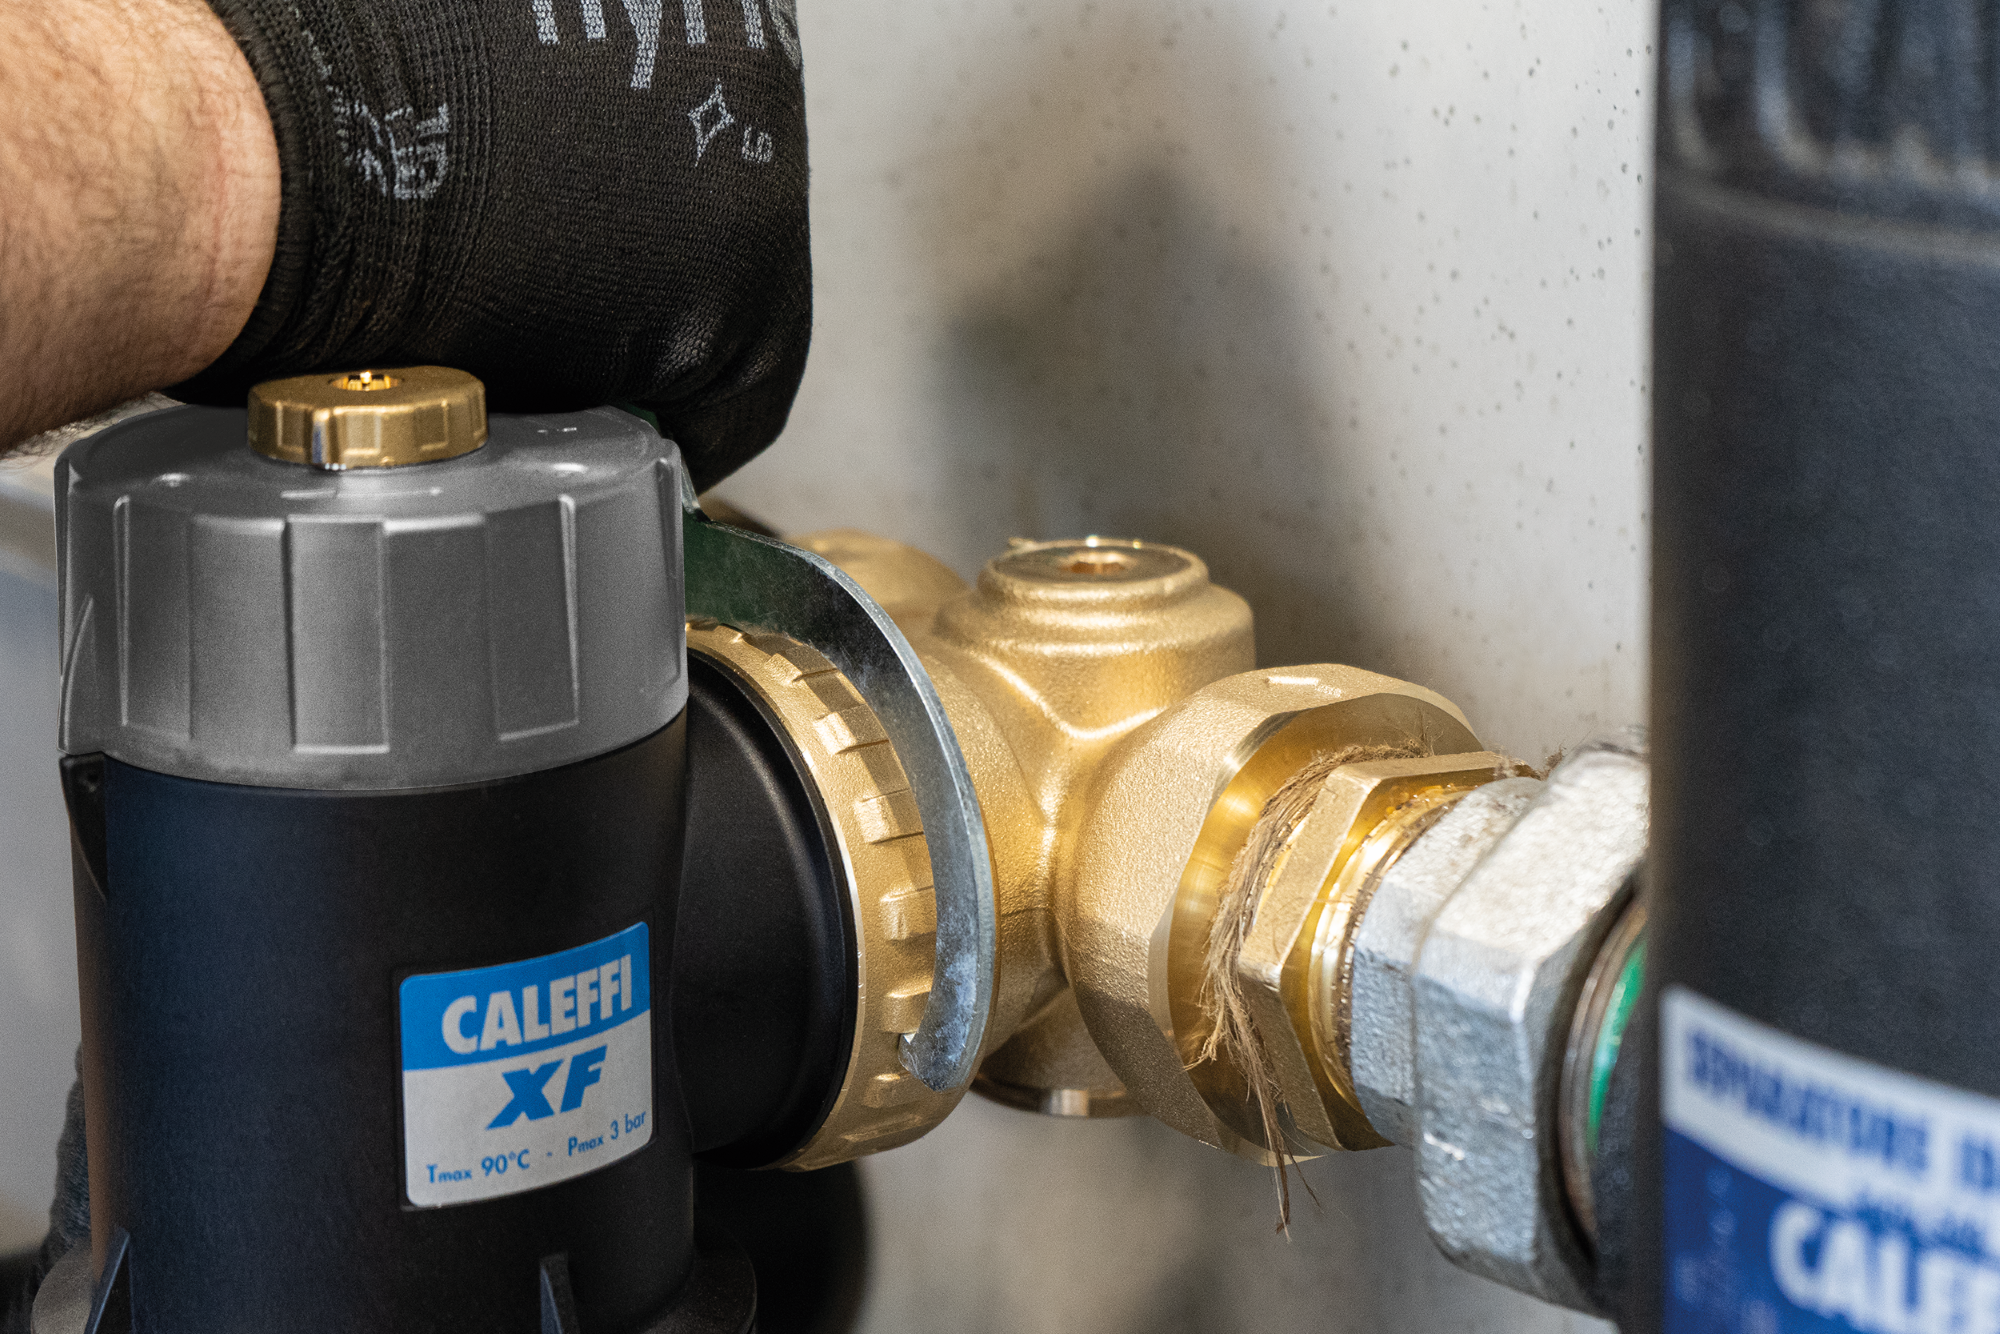
Step 4:
Connect the main filtration piece to the body piece to the body and tighten using the unique spanner (which comes with the Caleffi XF).
Step 5:
Once water is introduced into the system, use the integral air vent to rid the system of air.
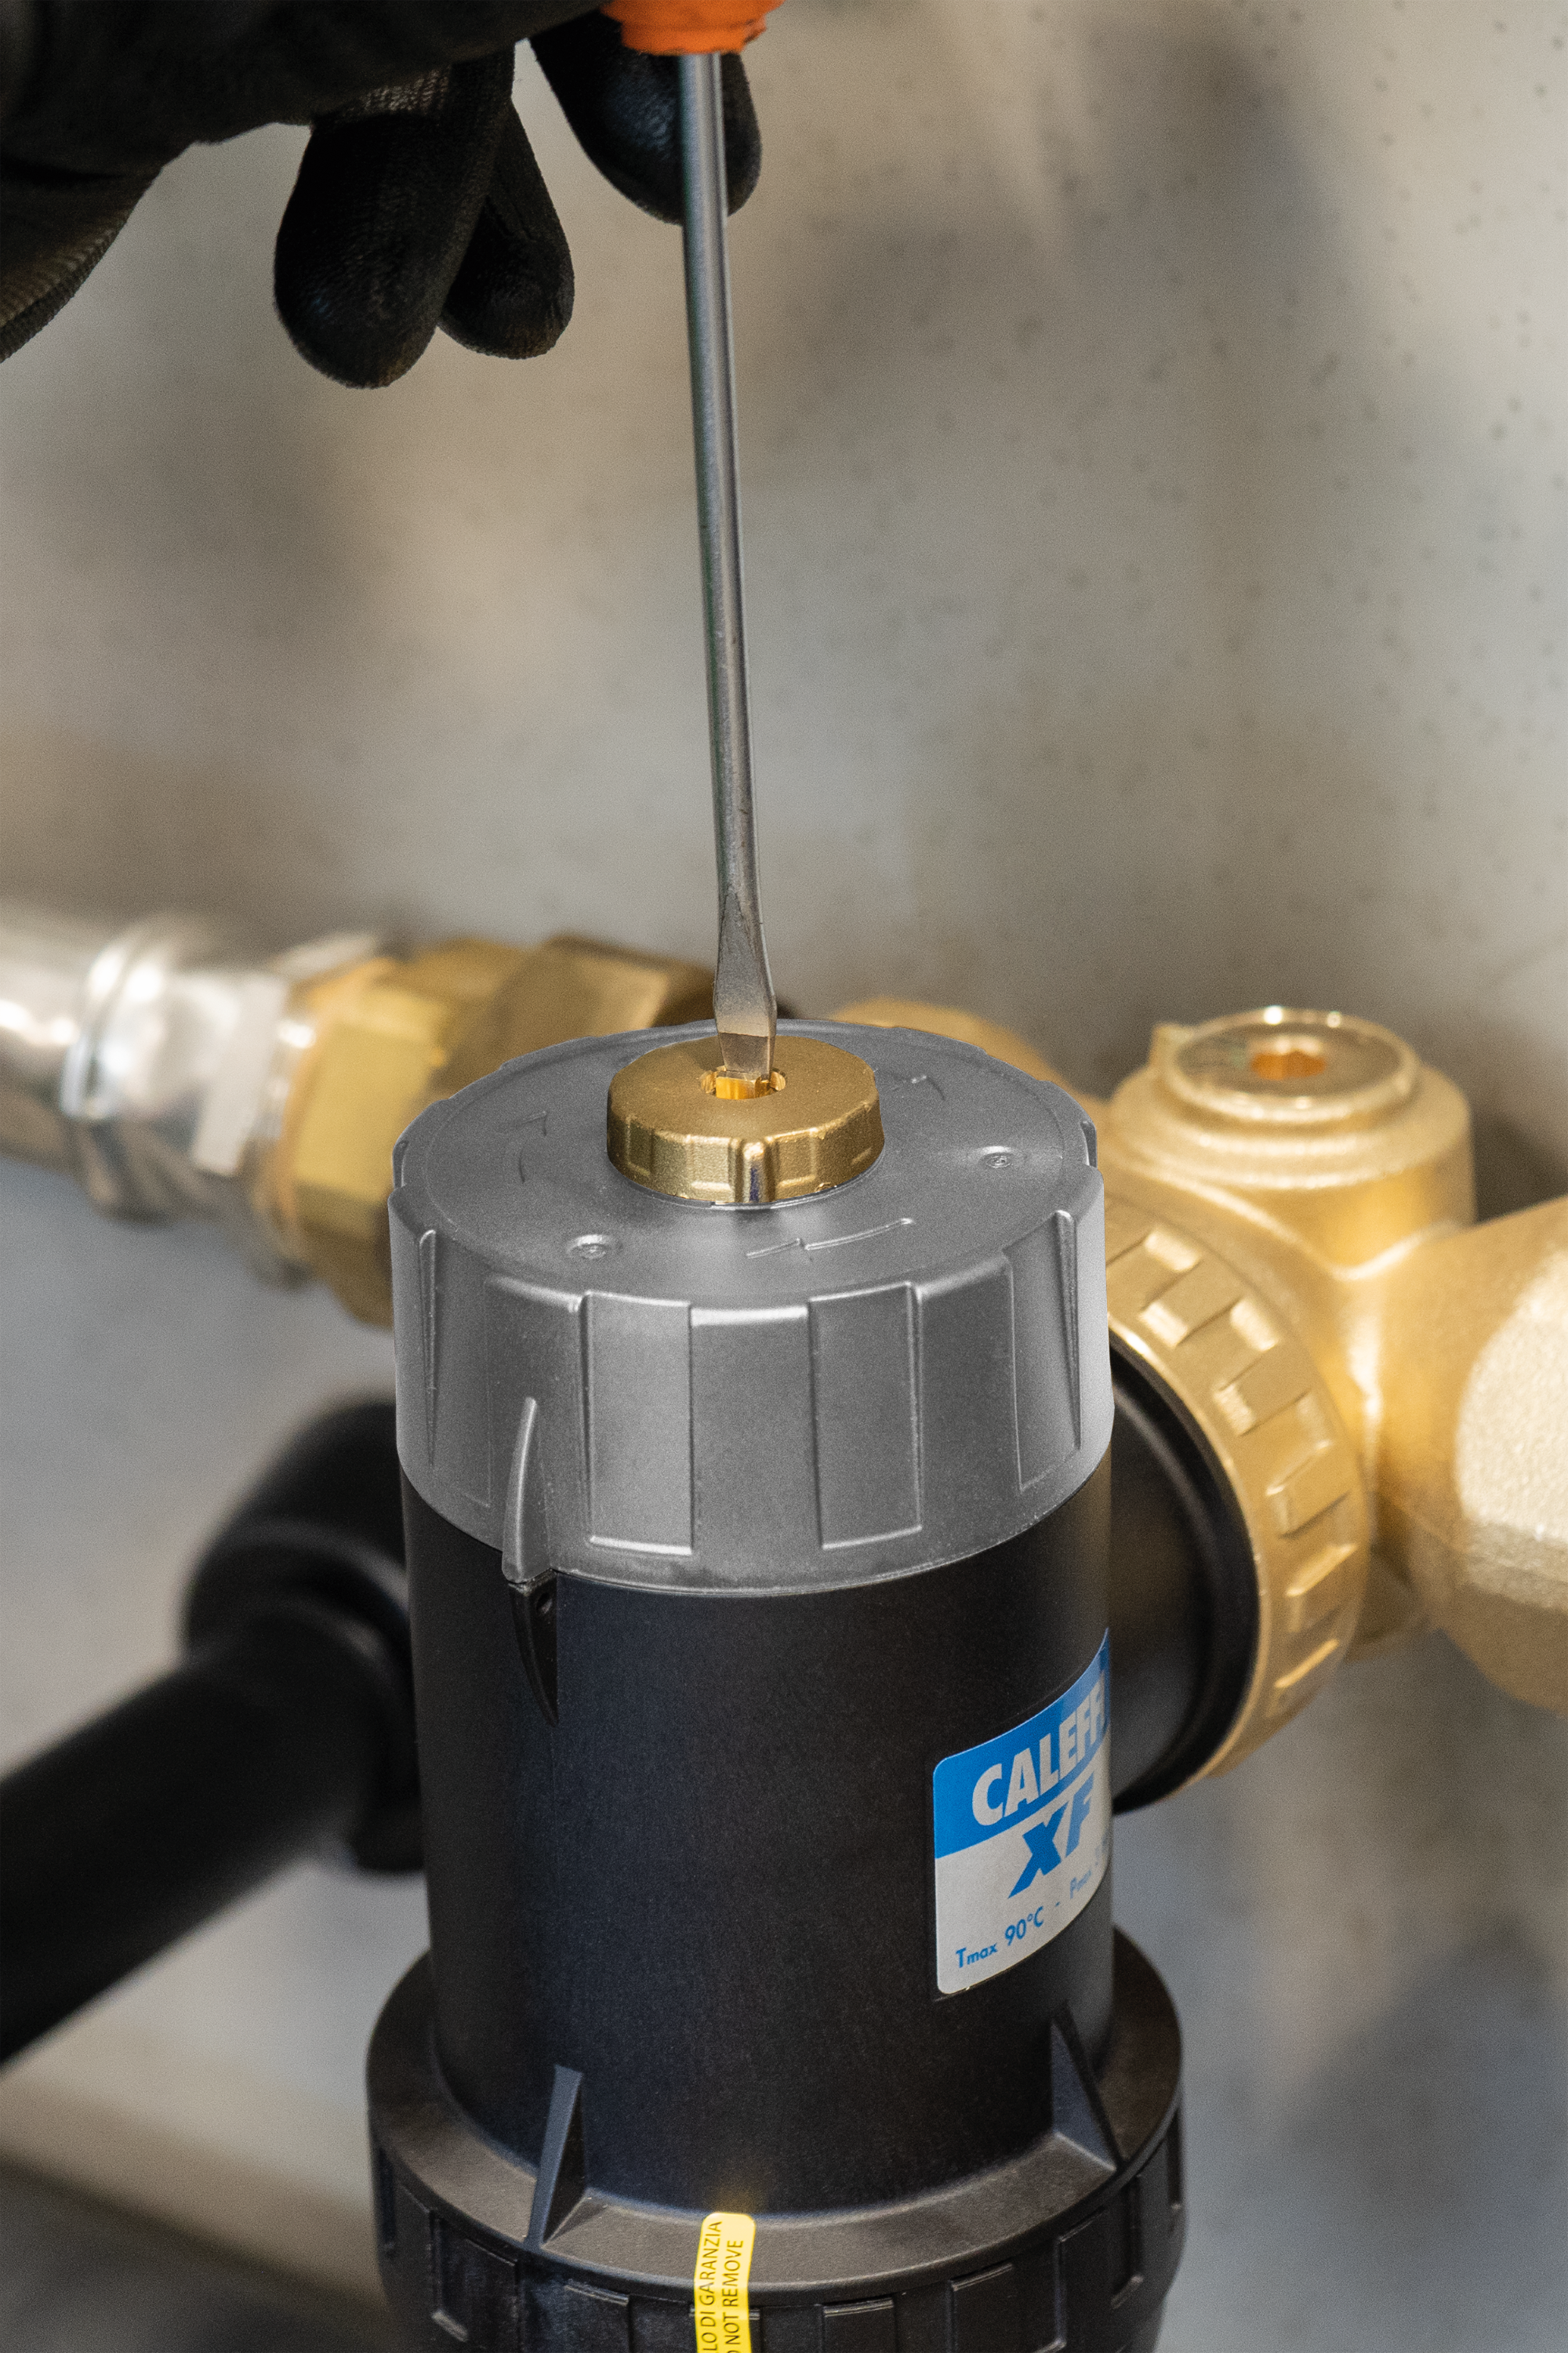
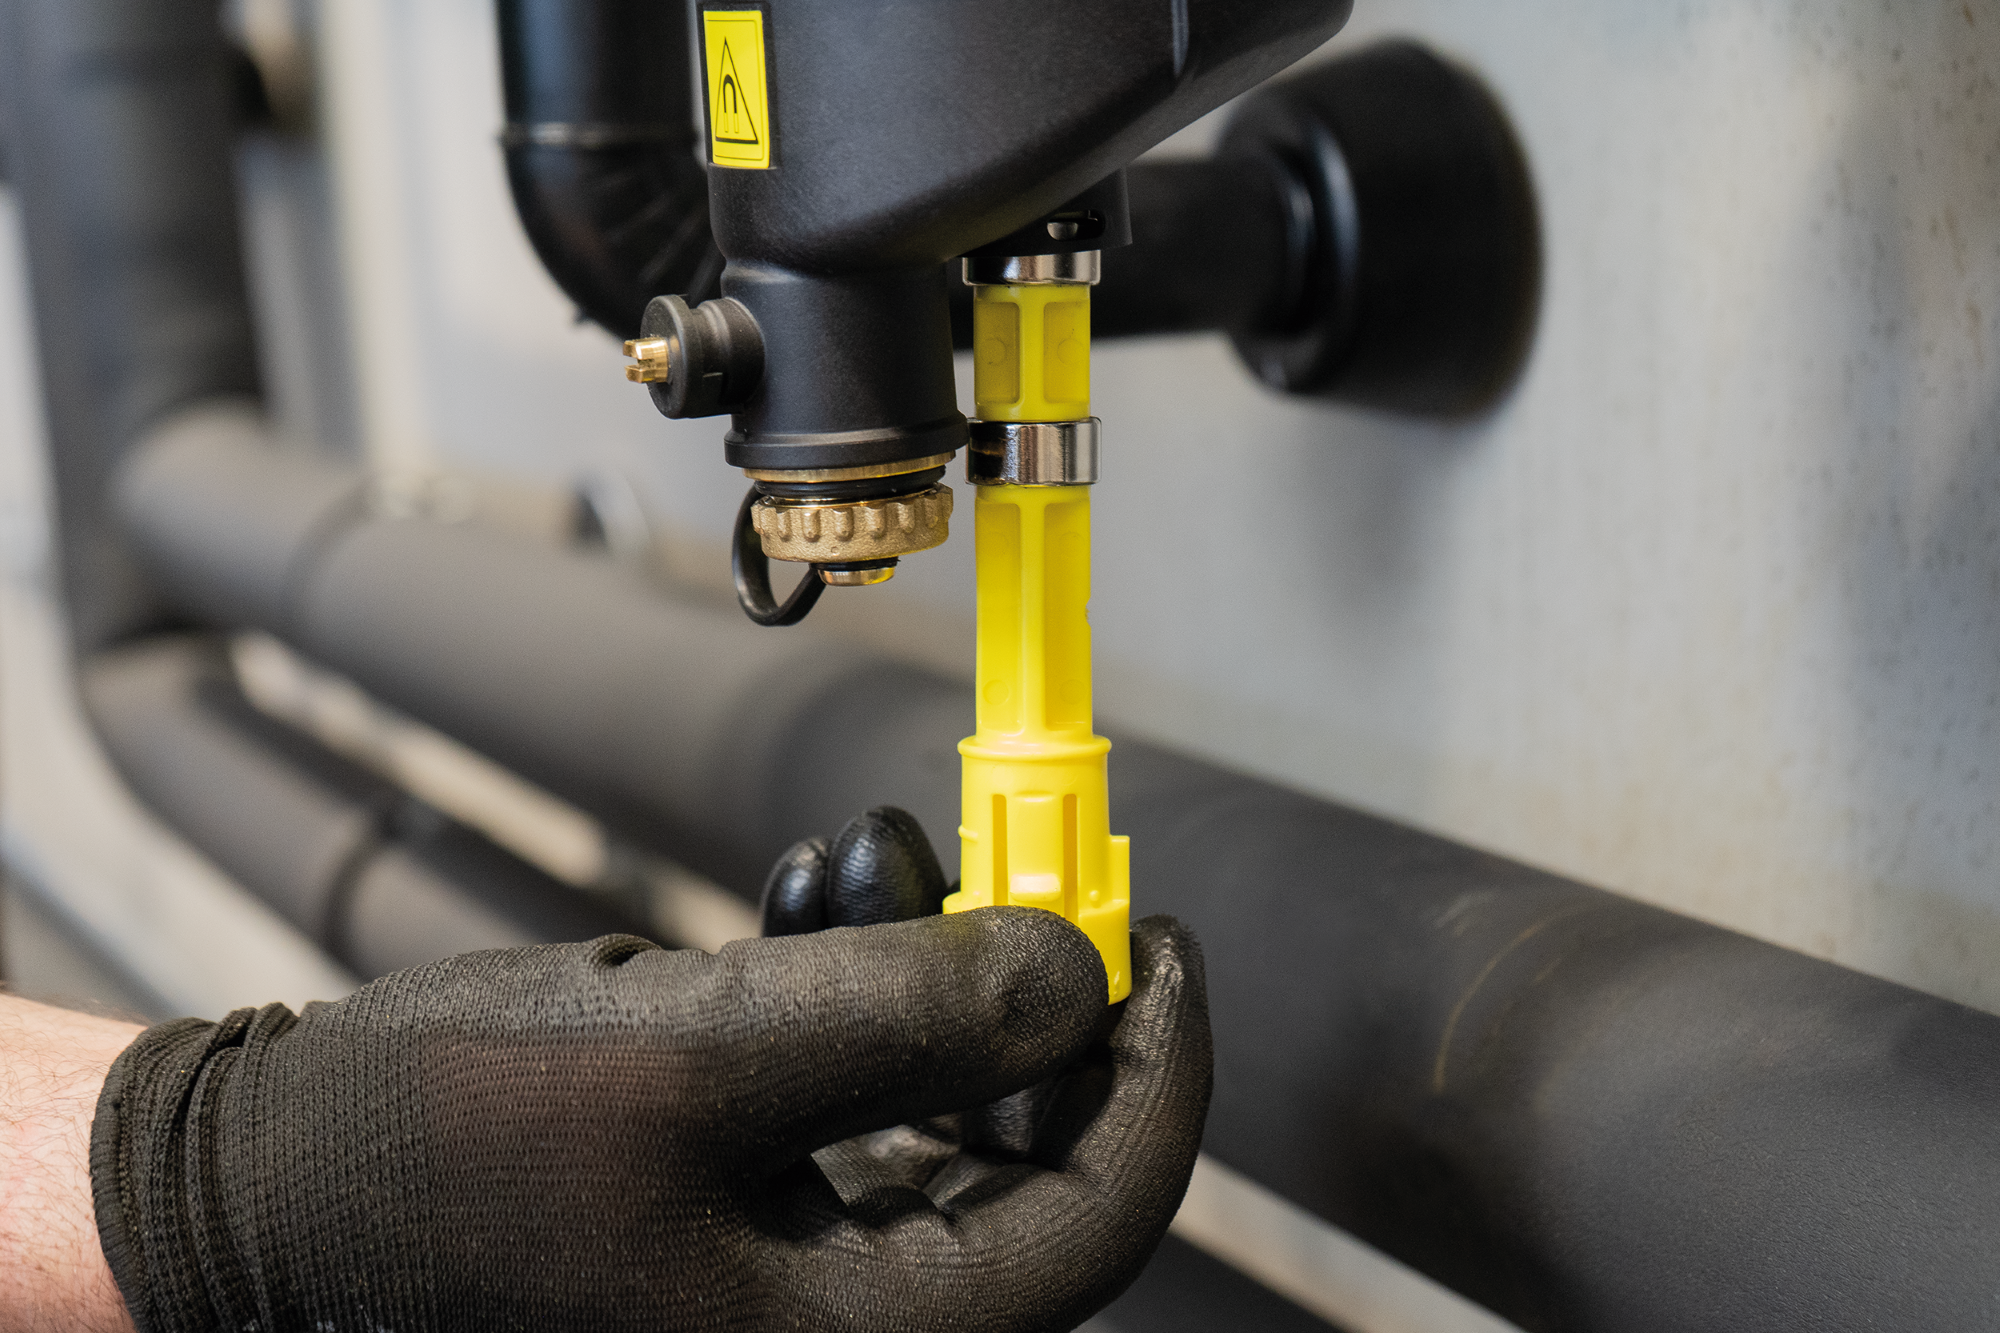
Step 6:
Insert dry pocket magnet to help capture impurities.
Step 7:
Rotate the top of the brushes to move brushes 360 degrees and clean the filter.
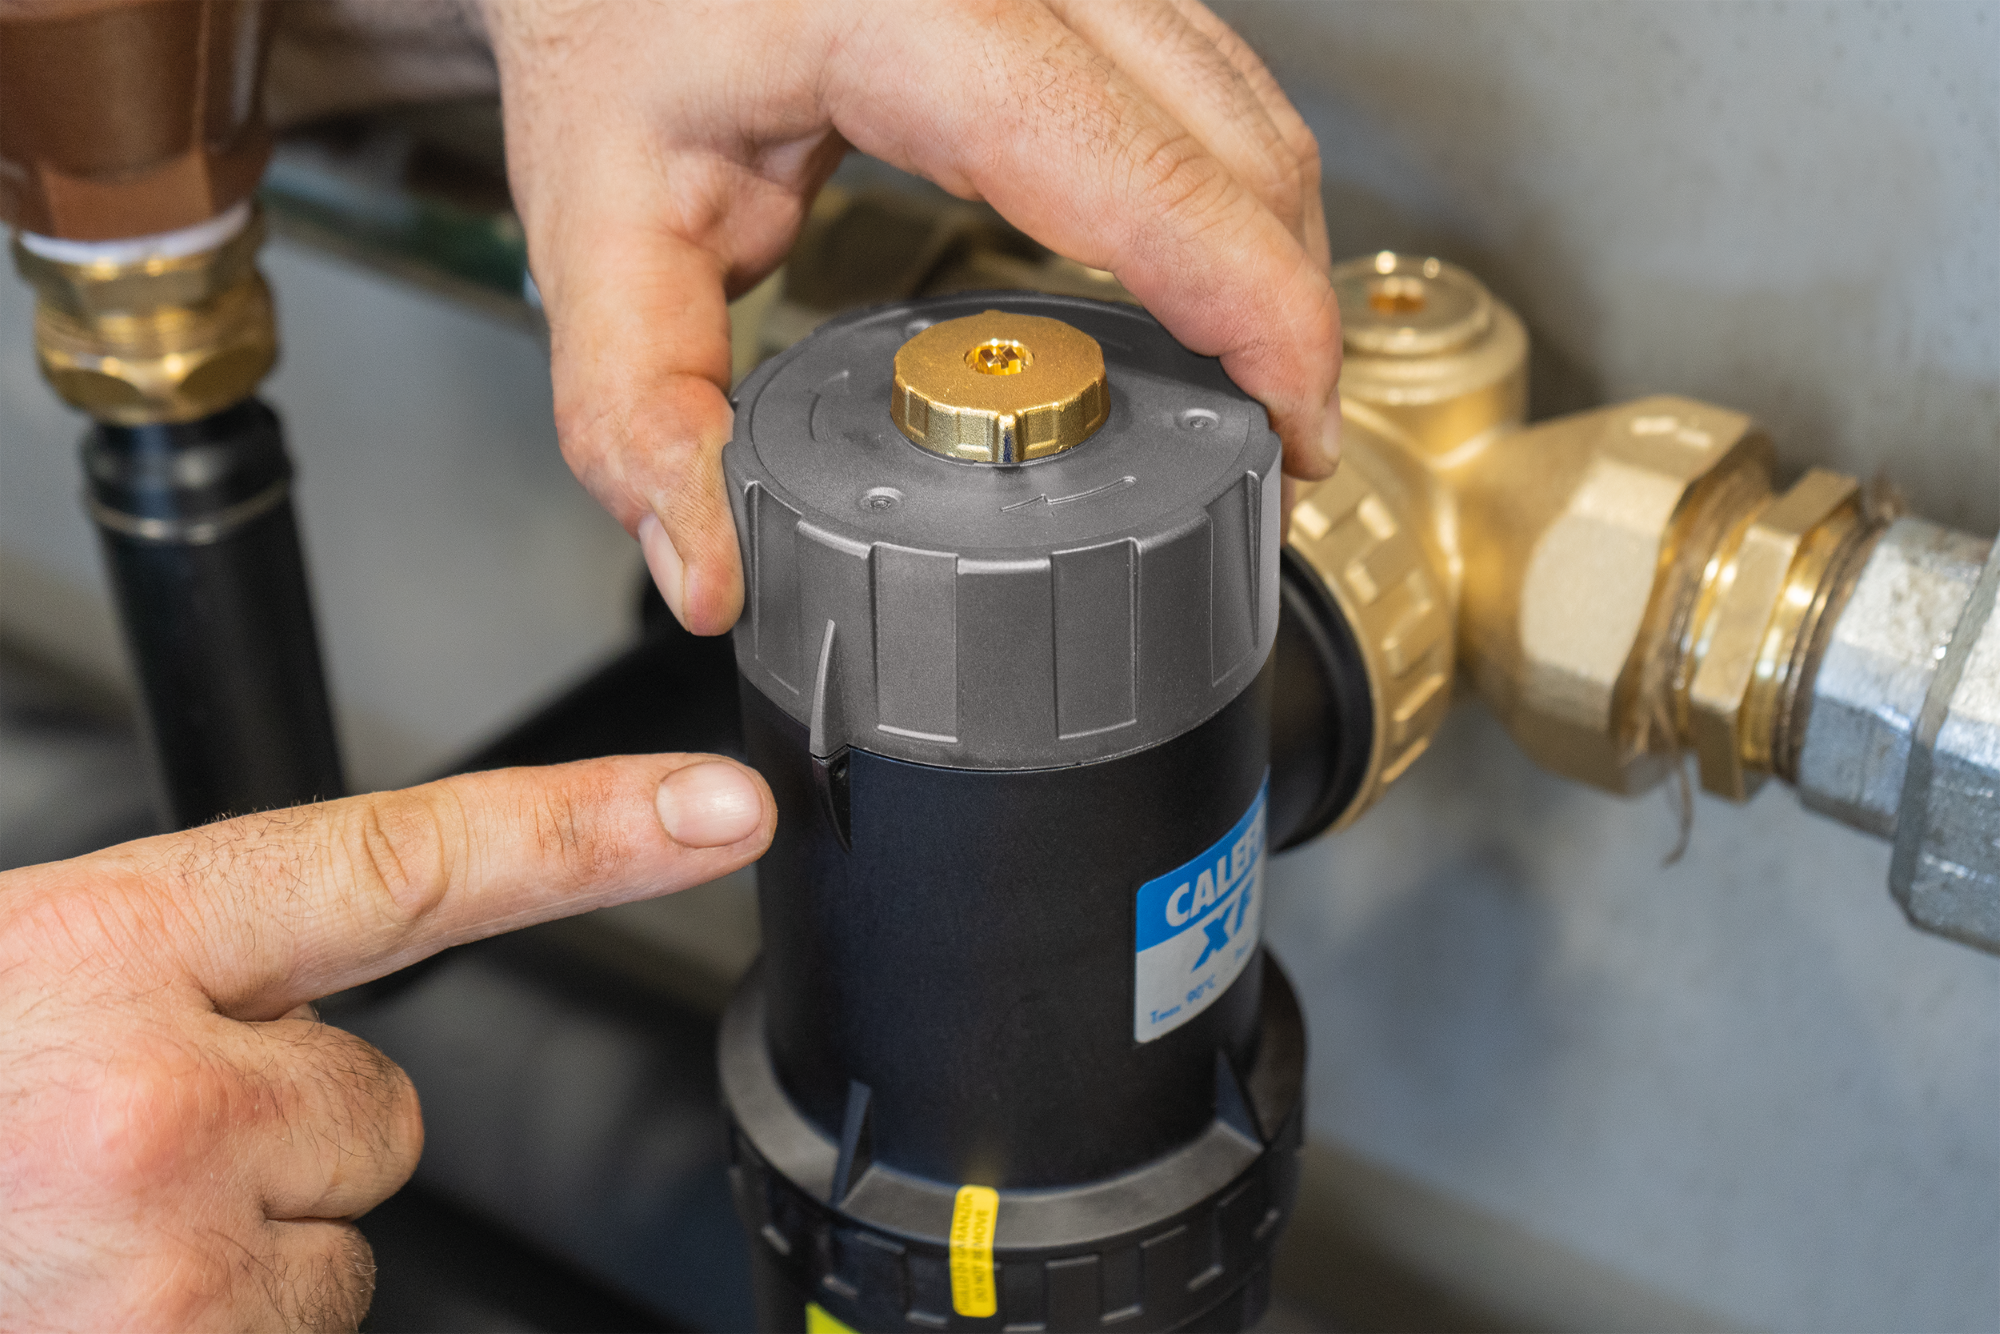
Start
Turning 360 degrees
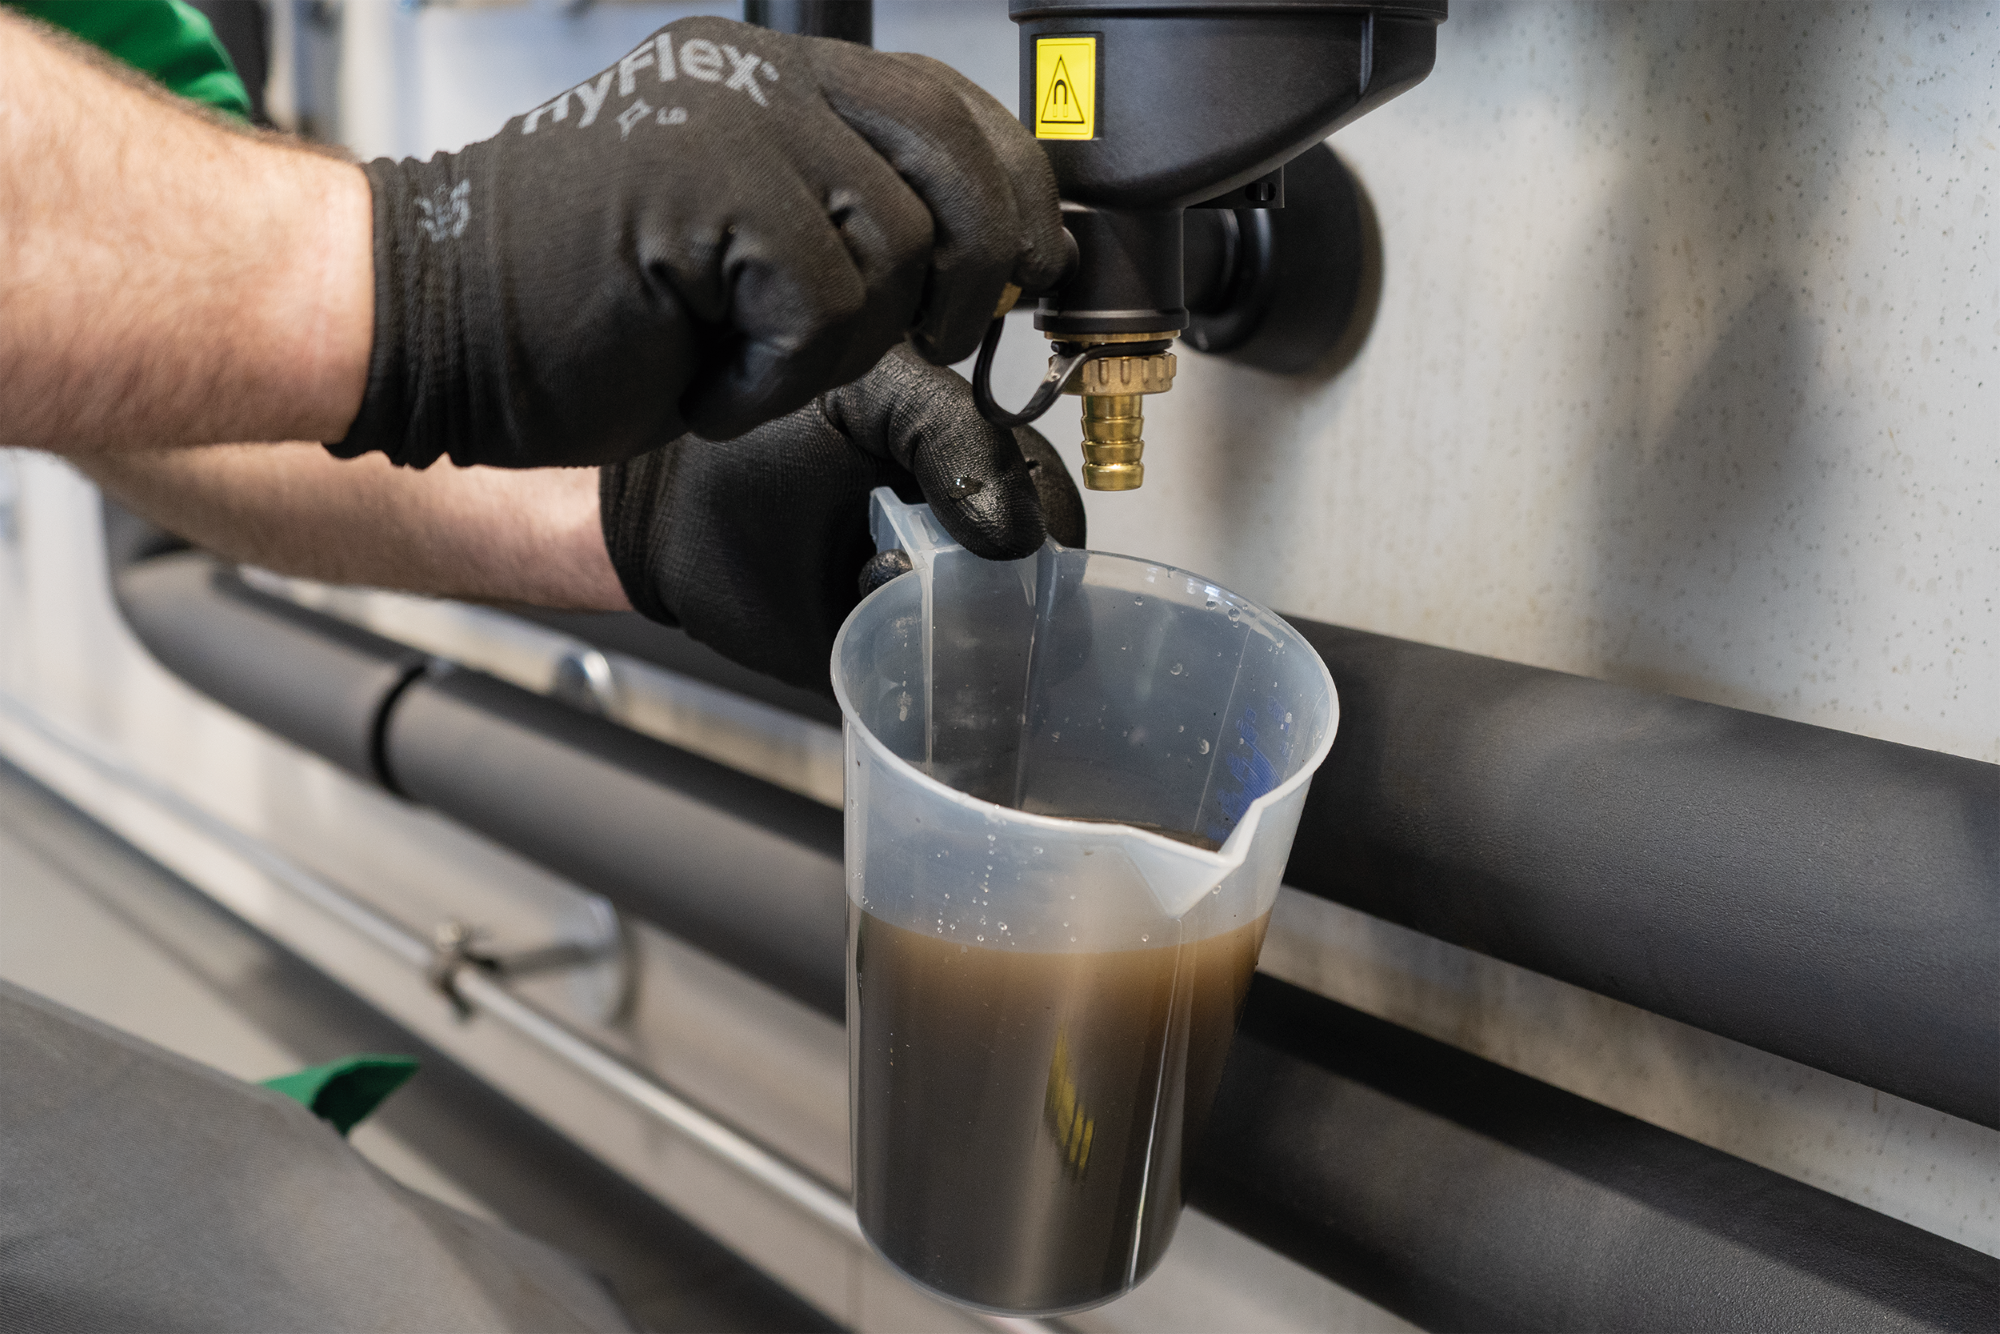
Step 8:
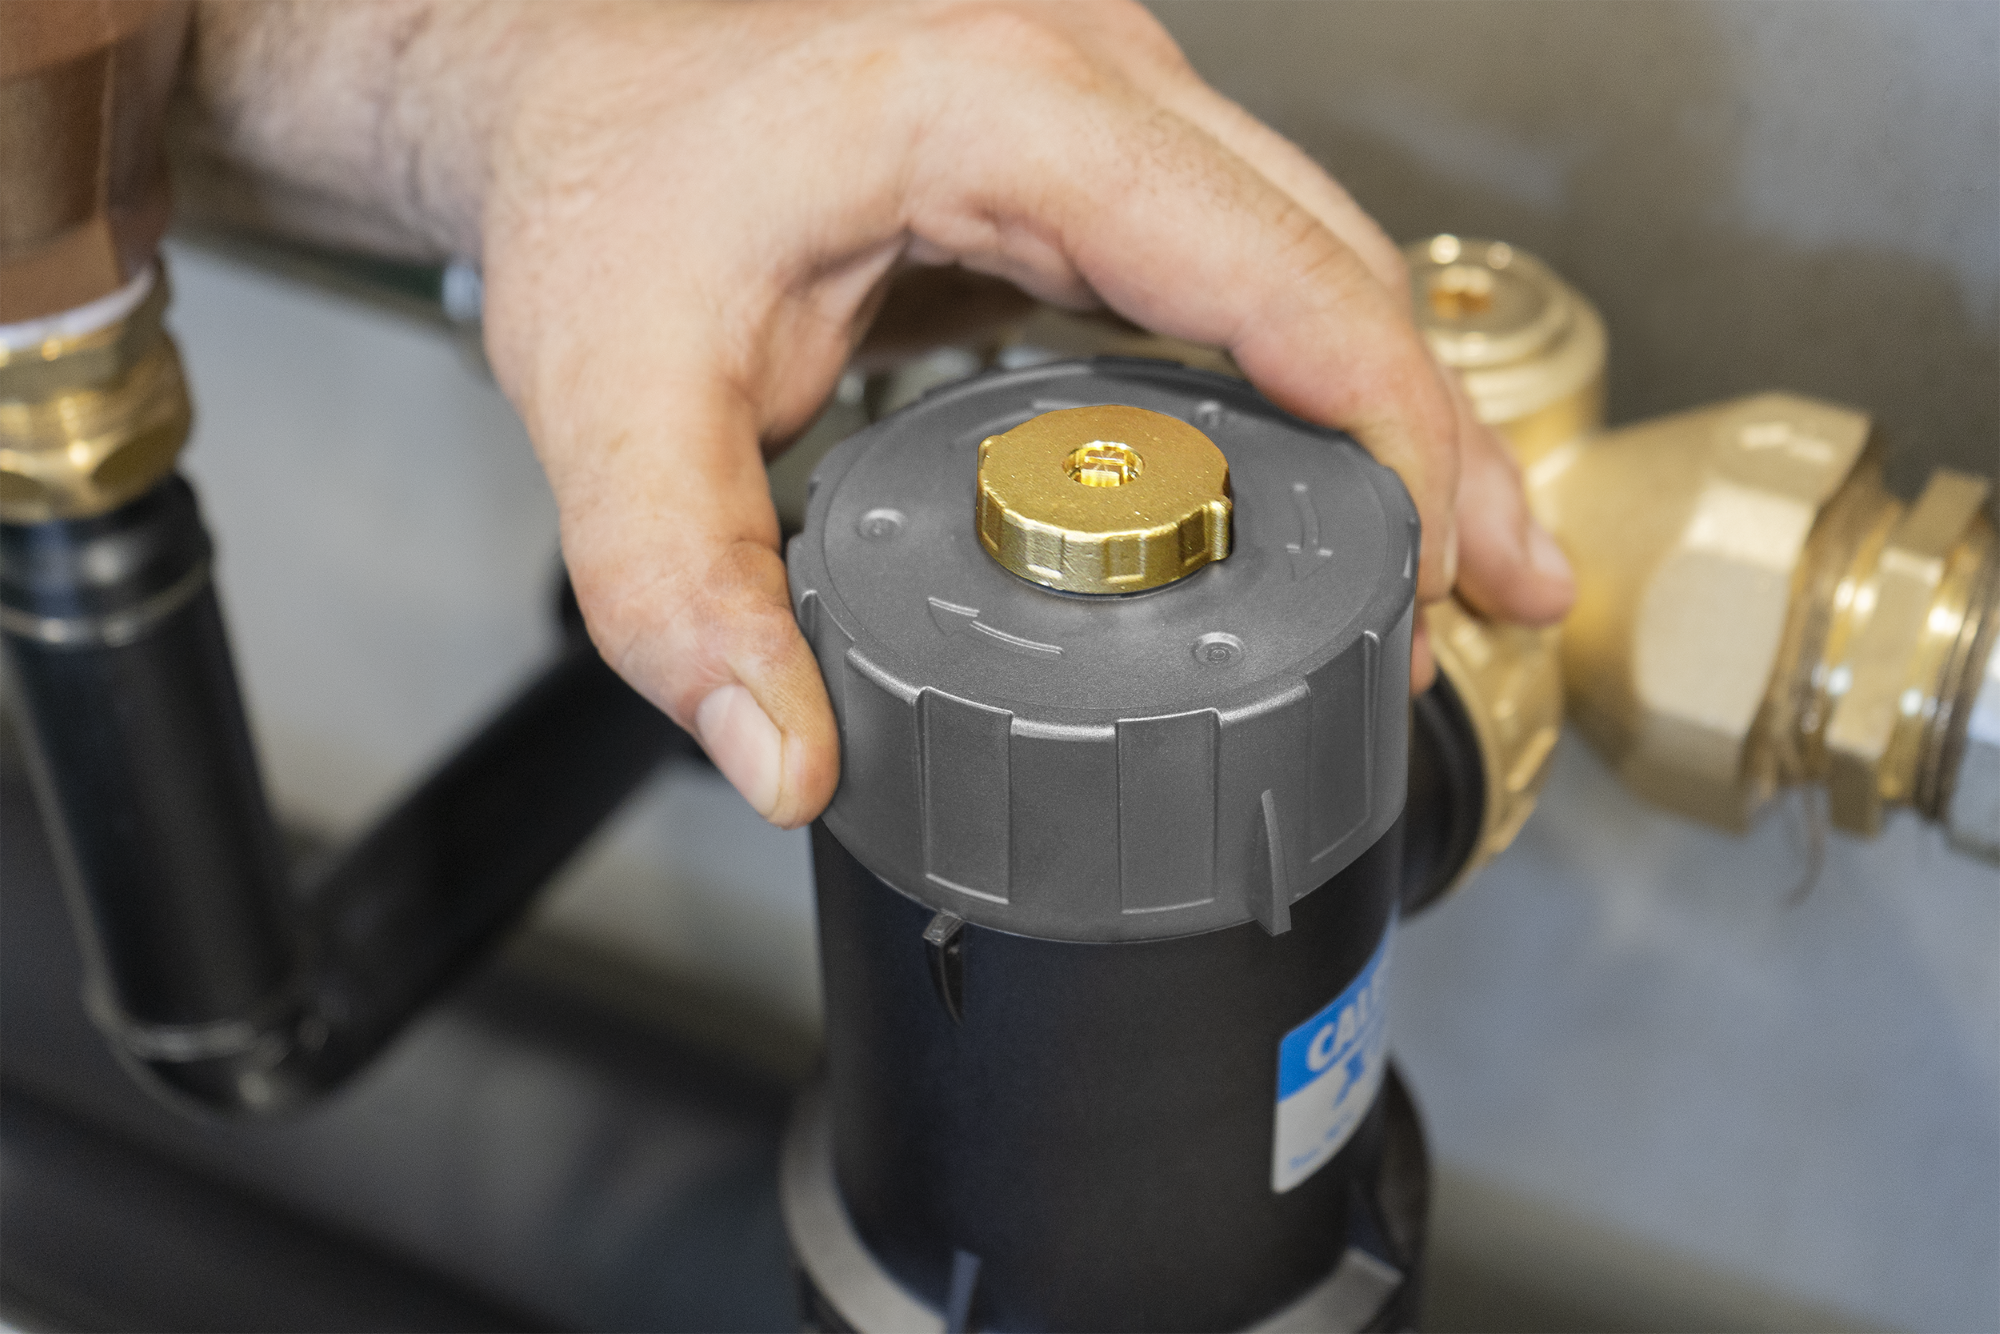
Once you have completed the 360-degree rotation, remove the magnet.
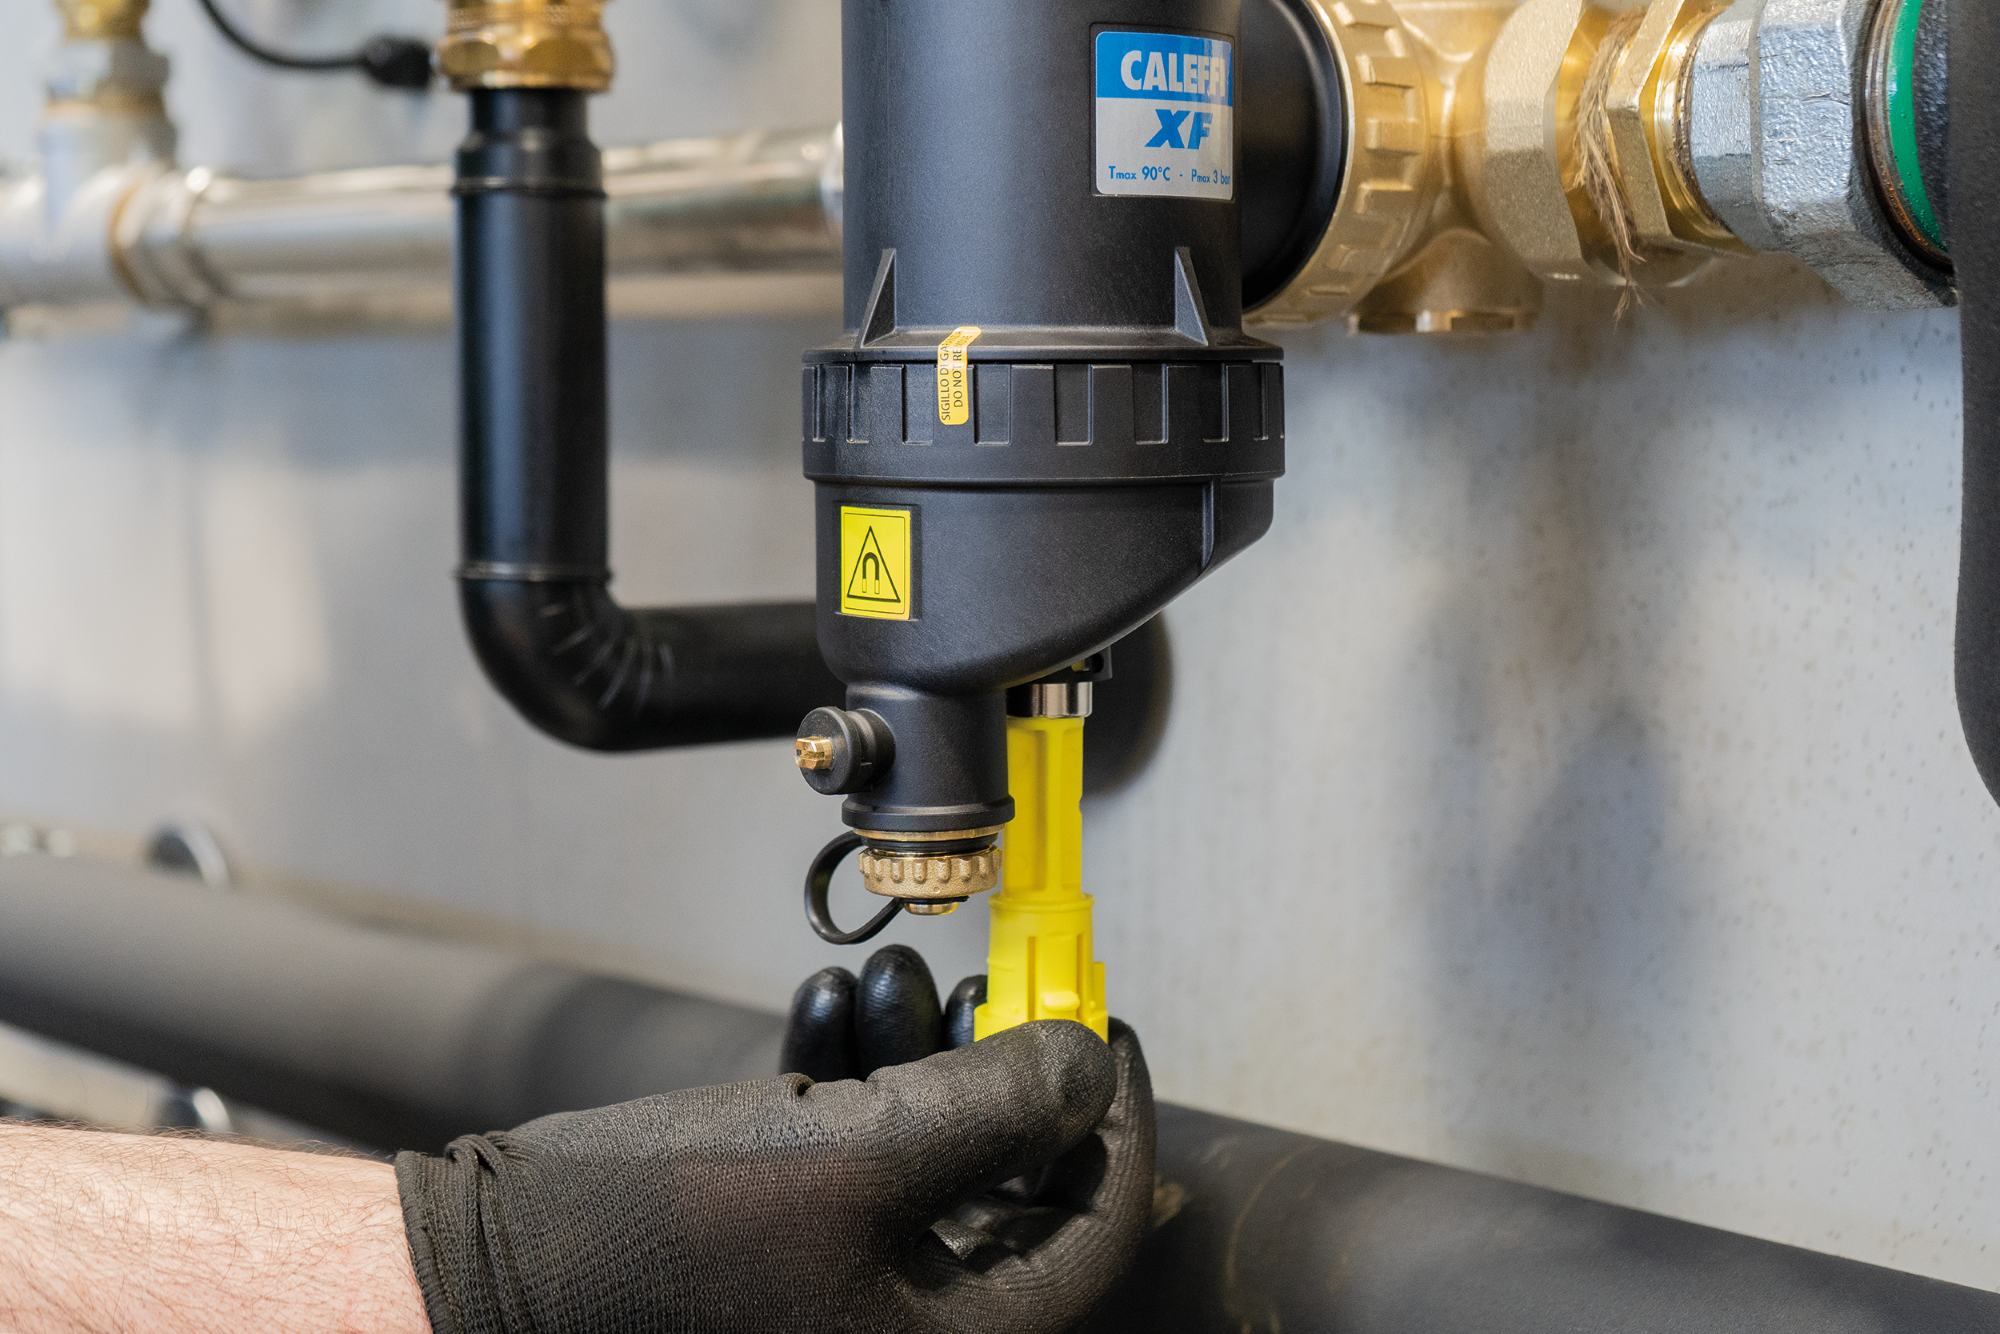
Step 9:
Open drain valve to remove system impurities.
For further information on installation of the Caleffi XF, or any other products, please visit our 'Contact Us' page.